Email account setup in Microsoft Outlook 2013 (SMTP/IMAP)
This tutorial will help you to configure your Hosting Nation Email account in Microsoft Outlook 2013.
NOTE: before setting up the email account using this tutorial, make sure you already have created the CPanel email account and have the password to the email account.
1. Open Outlook, select tab File > Add Account: 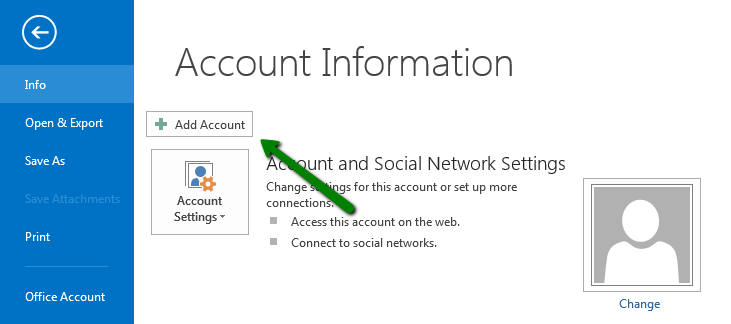
2. Check the option E-mail Account.
3. Check the option Manual setup or additional server types and click on Next: 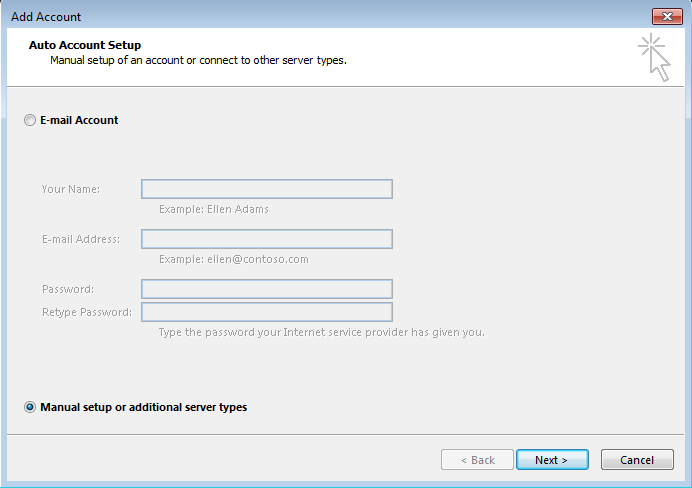
4. Select POP or IMAP and click on Next: 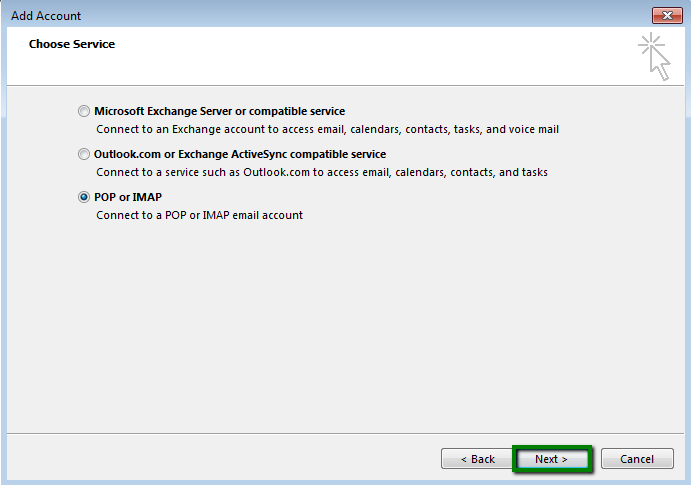
5. Fill out the corresponding fields:
Your Name: the one you wish to have for this account
Email Address: full email address
Account Type: IMAP or POP3 (Choose IMAP if you are not sure or you wish to connect to the email account with more than one device).
Incoming and Outgoing mail server (SMTP): mail.yourdomain.com (for both mail servers)
User Name: full email address
Password: password for this mail account
Require logon using Secure Password Notification (SPA) should to be unchecked:
NOTE: if by any chance you don't remember your password, you can easily reset it using your Cpanel login. Browse to the Email section and select Password to reset the password.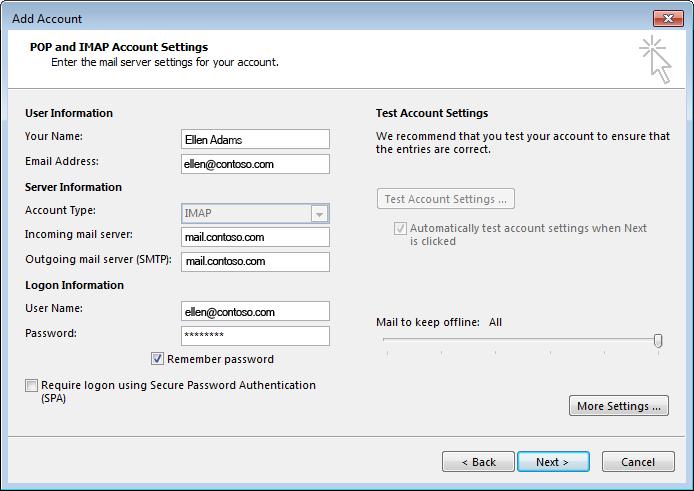
4. Once done, click on More settings in the lower right corner of the window.
In the tab Outgoing Server checkmark the option My outgoing server (SMTP) requires authentication > Use same settings as my incoming mail server: 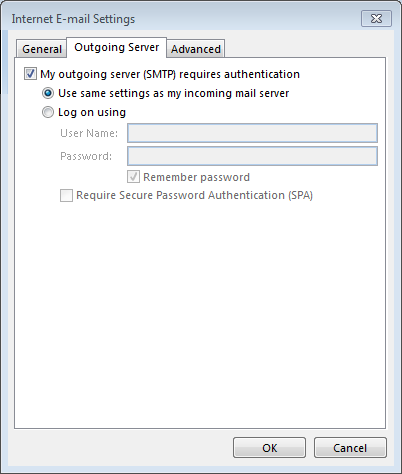
5. In the tab Advanced configure port settings as follows:
IMAP: port 993 for SSL or port 143 for TLS
POP3: port 995 for SSL or port 110 for TLS
SMTP: port 465 for SSL or port 587 for TLS 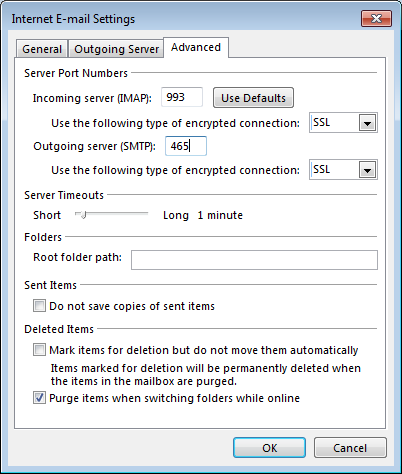
6. Once all is done, click OK to close the window and then Next to test server connection: 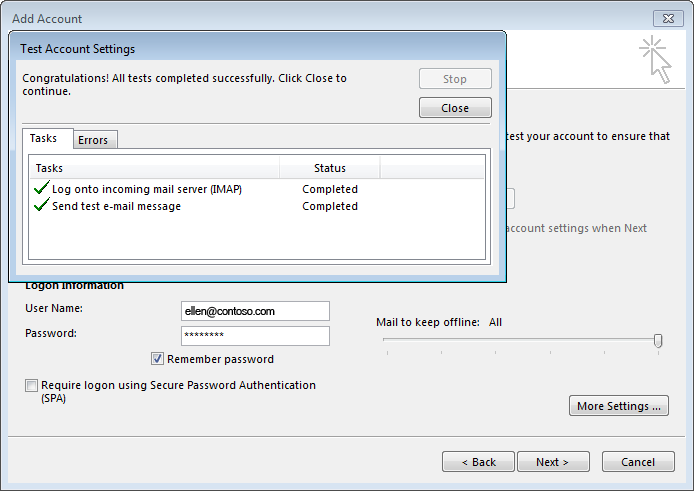
That's it!
Comments
0 comments
Please sign in to leave a comment.